Let’s see some NES rules!
Famicom/NES console have some rules for graphics. We are not here to make pixel-art but to find some solutions to make graphics that you can use for a NES/Famicom game. It’s harder to create NES GFX as to do pixel-art because we need to respect limitations. It was nice to see the palette’s limitations but there is more limitation that we will need to take care of. The console have a specific system for graphics.
Background
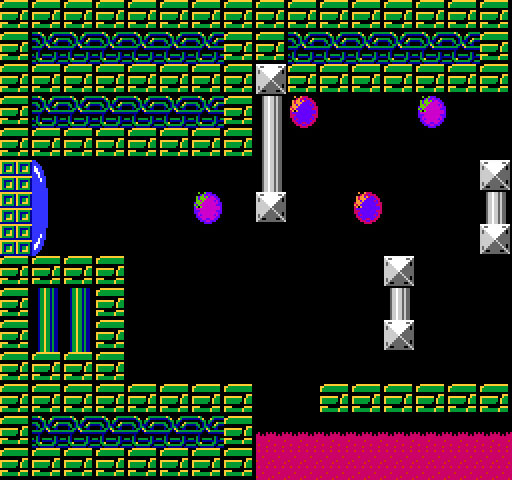
To understand how the BG works, we need to analyse how it appears on a screen. The size is 256×240 px.
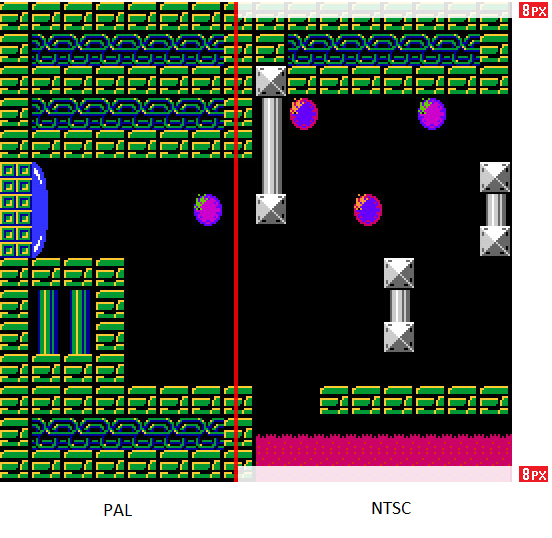
But for the US, the screen cuts out 8px top and down.
If you want to make a game with international intent it is better to design it for a size of 256×224 px
Here you can see the difference between PAL and NTSC (US) screen.
The Background is composed of Big Blocks like a grid. You have 16×15 big blocks and this is very important! Why? Because this big block of 16×16 px can use only one palette! All Graphics and design will be influenced by this simple rule. You can see already the structure of BG with few different tiles blocks.
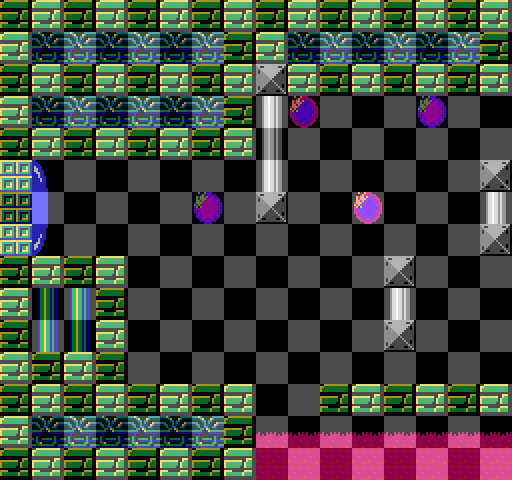
Now, you need to be attentive. One big block is composed of 4 tiles and uses only one palette of 4 colors.
Each block is 16×16 px. Each tiles is 8×8 px.
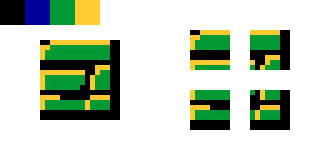
We will need to keep this rule in mind . We are lucky to have one color similar on each palette. it will be something useful, we will see it after. For the moment, we are done with the BG’s rules.
Sprite
Let’s see what happens with sprites.
The Main limitation is TV scanline. If you don’t understand, it’s normal. Your TV, like all the old TV, put the image of console per line. Starting from top-left to the bottom-right. Line by line, from left to right. If you look closer your TV, you can see the how the “line of pixel” are display on top part of the screen.
Now we will see more closer how the scanline works on top part of our screen. You need to keep in mind this is normally for full screen. The signal (in Pink/Purple) refresh the picture and when the full screen is load, the next frame will be load again from the top-left. This is very fast that your eyes can’t catch it.

Here’s a video that show the scanline on a real CRT, taking Super Mario Bros. as an example.
You are limited to 8 sprites per scanline. If you put 9 sprites, the last one will disappear. Developers found a solution for this: BLINKING SPRITE.
Everybody already saw some sprite blinking in a NES game . It was not a mistake, it was an extra-code to allow you to see more than 8sprite. And because the frame of screen go fast, it’s blinking.
For example we have 3 meta-sprites of Rabbit-Robotic. We will calculate the number of sprite per line.
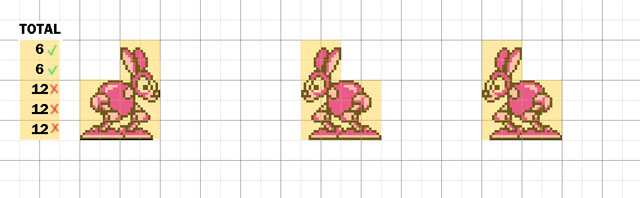
The solution is to code which sprites that need to disappear and which one need to appear at specific time. Each frame will show different sprites (respect the limitation of 8 sprites maximum).
Here we have 4 sprites to manage. (12 sprites-8 sprites limit= 4 sprites in excess). In one frame, the 4 last sprites disappear, in the second frame it’s the 4 sprites of the middle that disappear. Now we will see the blinking code in slow motion.
That’s it! It’s really boring because big sprites will always be something to solve.
Anyway, it’s not a problem because limitations force you to be creative! And we are here to find creative’s solutions ^^